Premiere Pro: Analyze All Clips
The Warp Stabilizer effect offers exceptional stabilization results. The downside of the effect is that every stabilization requires an analysis of the video that should be stabilized. Depending on the length of the clip, this process can take quite a while. At the same time, it’s also a poor idea to apply the Warp Stabilizer effect on too many clips at once. Premiere Pro is more likely to crash when running several stabilizations at the same time.
Users that want to stabilize many videos in the background or overnight have long requested an “Analyze All” button that offers sequential analysis. The Batch Analysis Plugin adds exactly this functionality to Adobe Premiere Pro:

Batch Analysis for Warp Stabilizer
This article deals with the Batch Stabilization plugin. Use below buttons to learn more about the extension:
Batch Stabilization for Adobe Premiere Pro
The following steps explain how you can analyze all clips in your timeline with just a few button clicks.
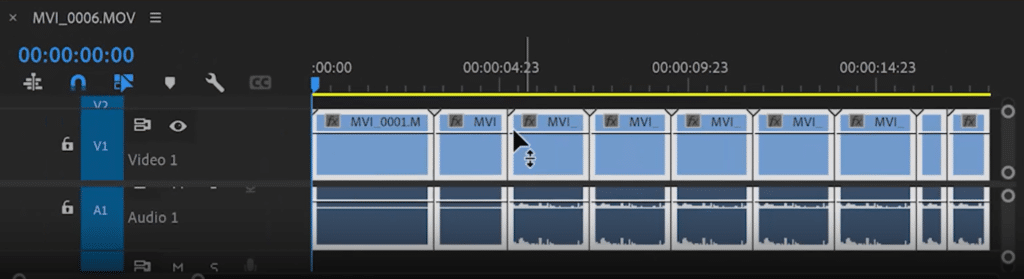
The Batch Analysis Plugin can be accessed under Window > Extensions > Batch Analysis after being downloaded through Adobe Exchange. After opening the extension, ensure that all clips intended for analysis have been added to the timeline. It’s always a good idea to make sure that the clips are already cut, as the analysis time scales with the footage’s length.
Solution 1:
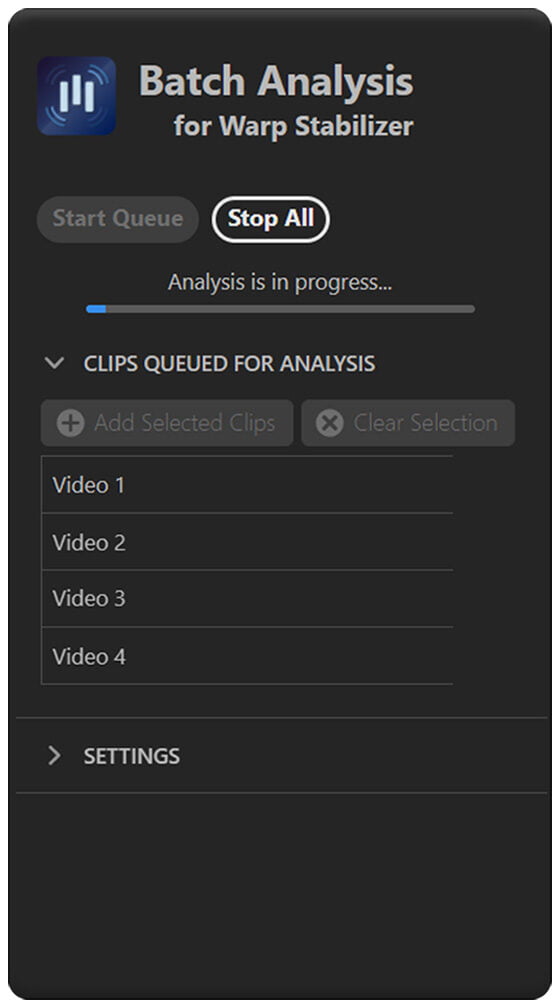
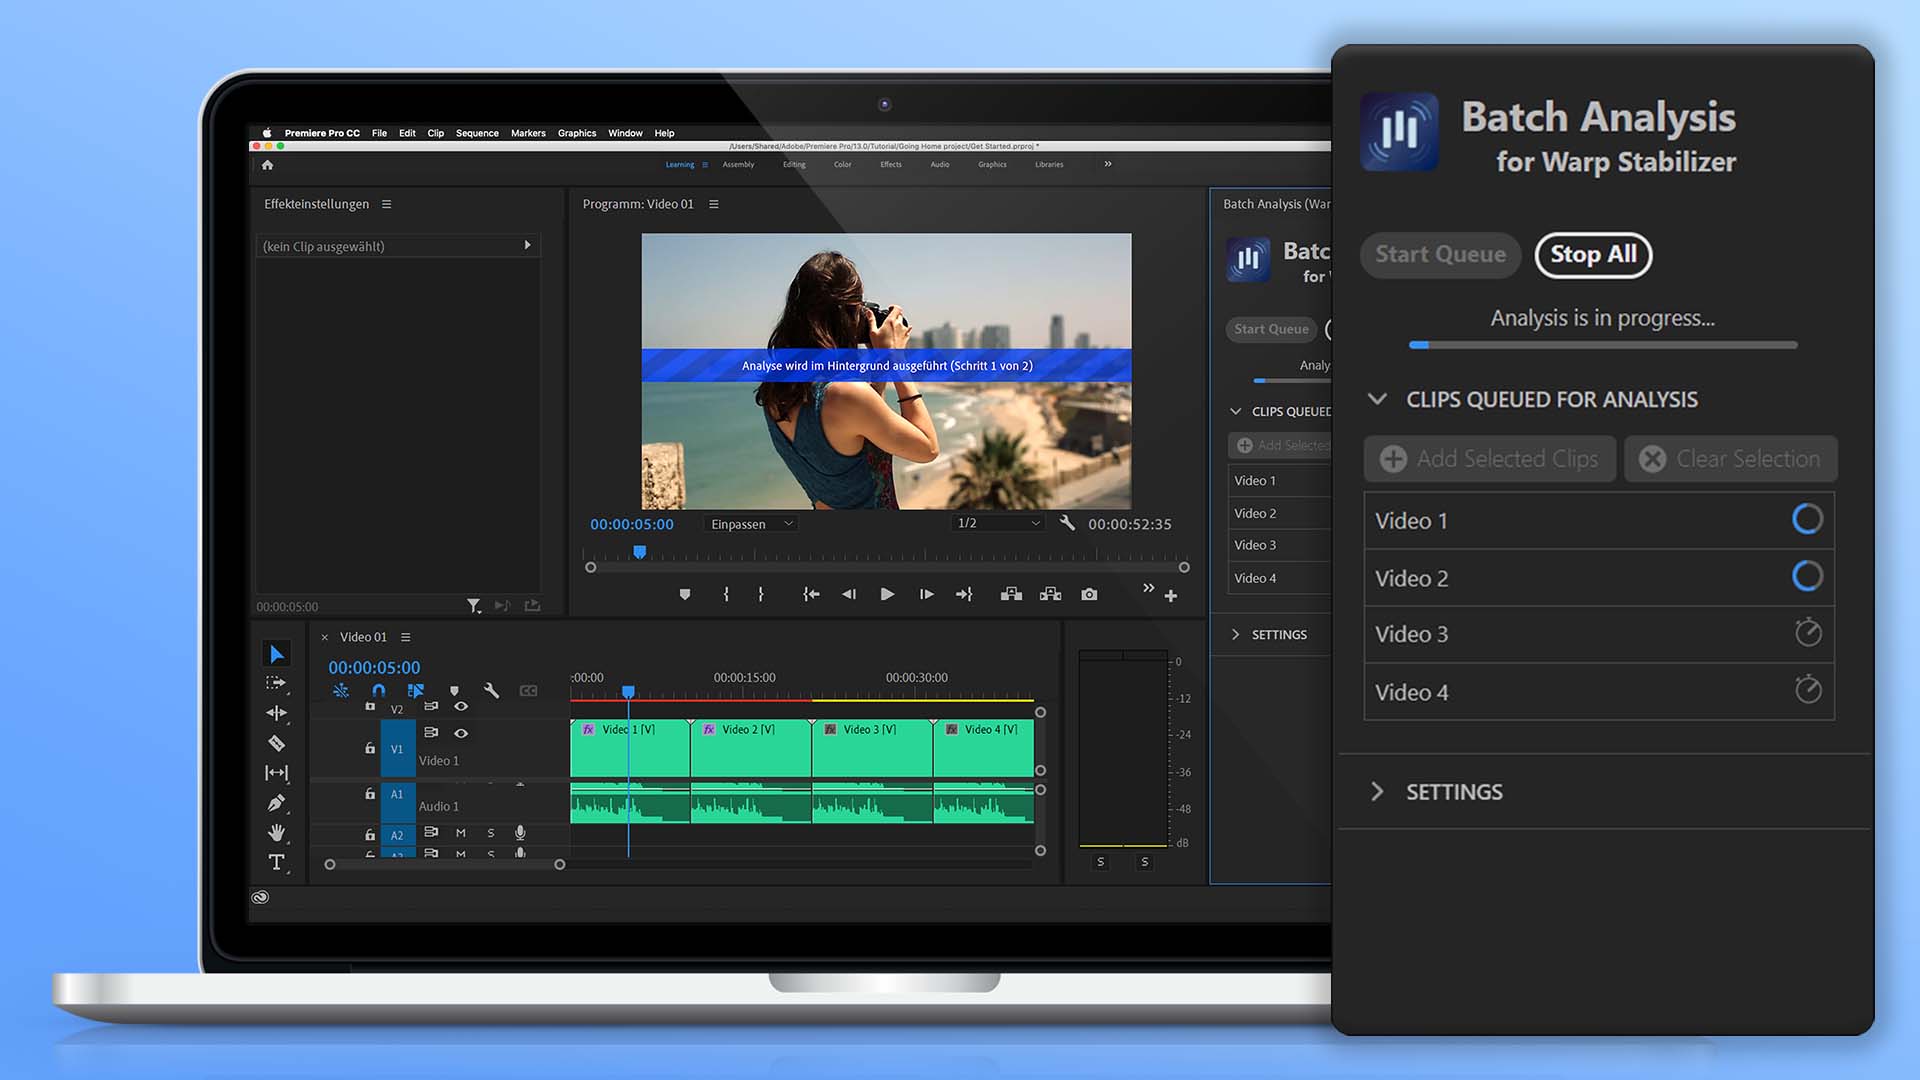
In your timeline, select all the clips that you want to stabilize. In the settings panel of the Batch Analysis Extension, ensure that ‘Add Warp Stabilizer if not present’ is enabled. If you prefer a more extensive analysis that produces better results but takes a little longer, enable “use detailed analysis”. You can also queue clips from other sequences or projects for stabilization. Once all the clips you wish to stabilize have been added to the queue, click “Start Queue” and wait for the stabilization to complete.
Solution 2:
This solution is primarily useful for people who want to adjust the stabilization settings before performing the analysis.
Manually apply the Warp Stabilizer effect to all clips you want to stabilize in your timeline. Then select “Add Selected Clips” in the batch analysis panel. Make sure “Add Warp Stabilizer if not present” is turned off. “Reanalyze all clips in queue” must be checked in the settings panel. Once all of the clips you wish to stabilize have been added to the queue, click “Start Queue” and wait for the stabilization to complete.
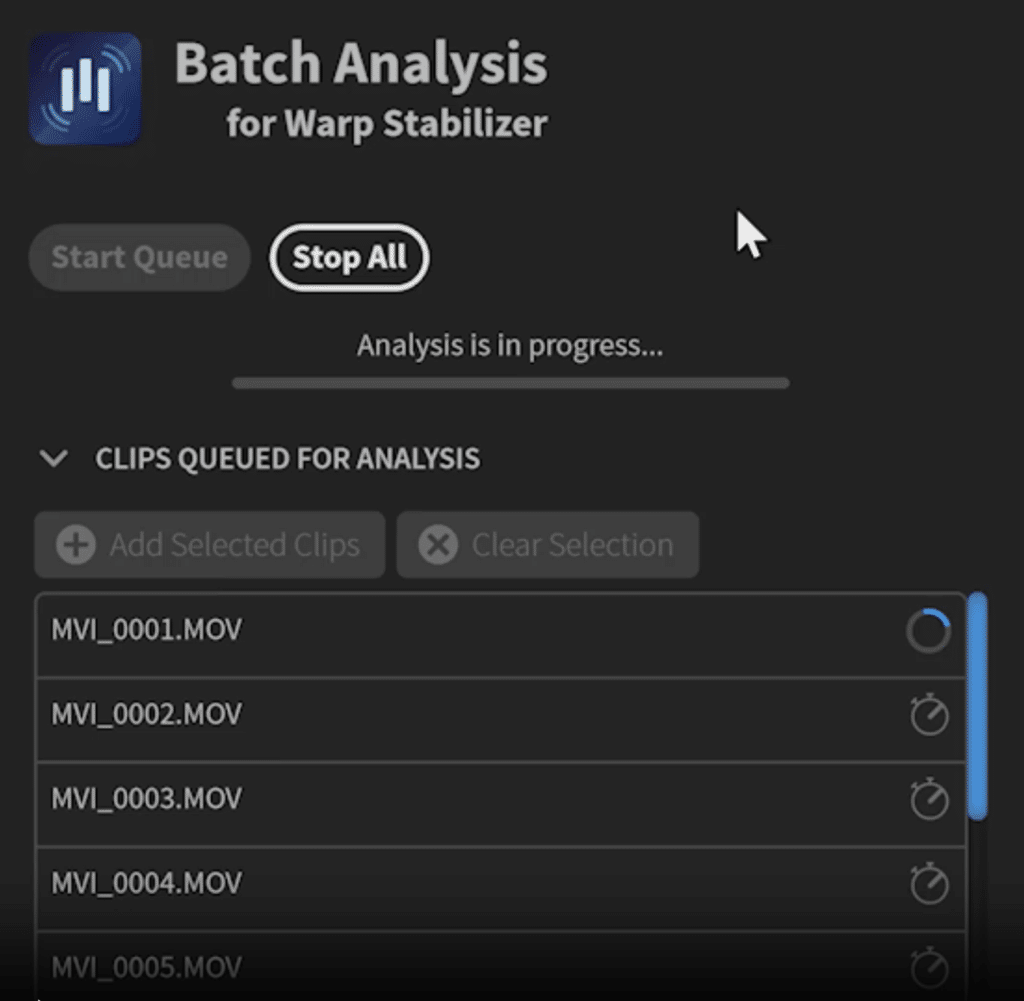
The videos that have been chosen will then be analyzed sequentially. It is recommended that you use the “Save current project when done” feature if you have a significant number of clips queued for reanalysis. This is also true if the analysis is set to run overnight. Once all clips have been successfully analyzed, the project will be saved.
Step by Step
How to analyze all clips in Premiere Pro (Warp Stabilizer)
- Install the Batch Stabilization Analysis extension
Download and install the Batch Analysis extension from Adobe Exchange and open the extension panel.
%22%20transform%3D%22translate(.6%20.6)%20scale(1.17188)%22%20fill-opacity%3D%22.5%22%3E%3Cellipse%20fill%3D%22%2354adff%22%20cx%3D%2210%22%20cy%3D%2271%22%20rx%3D%2224%22%20ry%3D%22255%22%2F%3E%3Cellipse%20fill%3D%22%232f2821%22%20rx%3D%221%22%20ry%3D%221%22%20transform%3D%22rotate(22.9%20-107.3%20540.5)%20scale(71.53714%2067.43151)%22%2F%3E%3Cellipse%20fill%3D%22%23342d2c%22%20cx%3D%2266%22%20cy%3D%2270%22%20rx%3D%2243%22%20ry%3D%2243%22%2F%3E%3Cellipse%20fill%3D%22%23767069%22%20cx%3D%22122%22%20cy%3D%225%22%20rx%3D%2248%22%20ry%3D%2248%22%2F%3E%3C%2Fg%3E%3C%2Fsvg%3E)
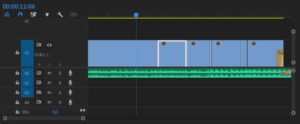
- Select all clips for analysis
In your timeline, select all the clips that you want to stabilize. Next, click on “Add Selected Clips” in the extension panel.
%22%20transform%3D%22translate(.6%20.6)%20scale(1.16406)%22%20fill-opacity%3D%22.5%22%3E%3Cellipse%20fill%3D%22%23525252%22%20rx%3D%221%22%20ry%3D%221%22%20transform%3D%22rotate(91.4%2062.4%20101.7)%20scale(40.56527%20117.11183)%22%2F%3E%3Cellipse%20fill%3D%22%230f0f0f%22%20rx%3D%221%22%20ry%3D%221%22%20transform%3D%22matrix(35.39573%20-10.55202%2060.95888%20204.48078%2024.7%2077.5)%22%2F%3E%3Cellipse%20fill%3D%22%230f0f0f%22%20rx%3D%221%22%20ry%3D%221%22%20transform%3D%22matrix(137.94871%20.719%20-.07224%2013.86085%20162.5%2095.2)%22%2F%3E%3Cellipse%20fill%3D%22%23767676%22%20cx%3D%22150%22%20cy%3D%2239%22%20rx%3D%2249%22%20ry%3D%229%22%2F%3E%3C%2Fg%3E%3C%2Fsvg%3E)
- Stabilize all clips
Click on the “Start Queue” button to begin the analysis and consequent stabilization of the previously selected clips.
%22%20transform%3D%22translate(1%201)%20scale(2.10547)%22%20fill-opacity%3D%22.5%22%3E%3Cellipse%20fill%3D%22%230e0e0e%22%20cx%3D%2271%22%20cy%3D%22175%22%20rx%3D%2251%22%20ry%3D%2267%22%2F%3E%3Cellipse%20fill%3D%22%234d4d4d%22%20rx%3D%221%22%20ry%3D%221%22%20transform%3D%22rotate(36.9%20-49.5%2047.9)%20scale(64.88548%20133.75907)%22%2F%3E%3Cellipse%20fill%3D%22%234f4f4f%22%20rx%3D%221%22%20ry%3D%221%22%20transform%3D%22matrix(-20.01562%20-.20961%201.47652%20-140.99223%20140.2%20118.7)%22%2F%3E%3Cellipse%20fill%3D%22%23101010%22%20rx%3D%221%22%20ry%3D%221%22%20transform%3D%22matrix(1.18936%20-29.61254%2018.52083%20.74387%20104%2061)%22%2F%3E%3C%2Fg%3E%3C%2Fsvg%3E)