In this article you’ll learn how to override the default Warp Stabilizer settings and create custom presets in Premiere Pro using the Batch Analysis Extension. This feature is available in version 1.5 or newer.
In the following example we are creating a new preset with a smoothness of 70%.
Creating a new Preset
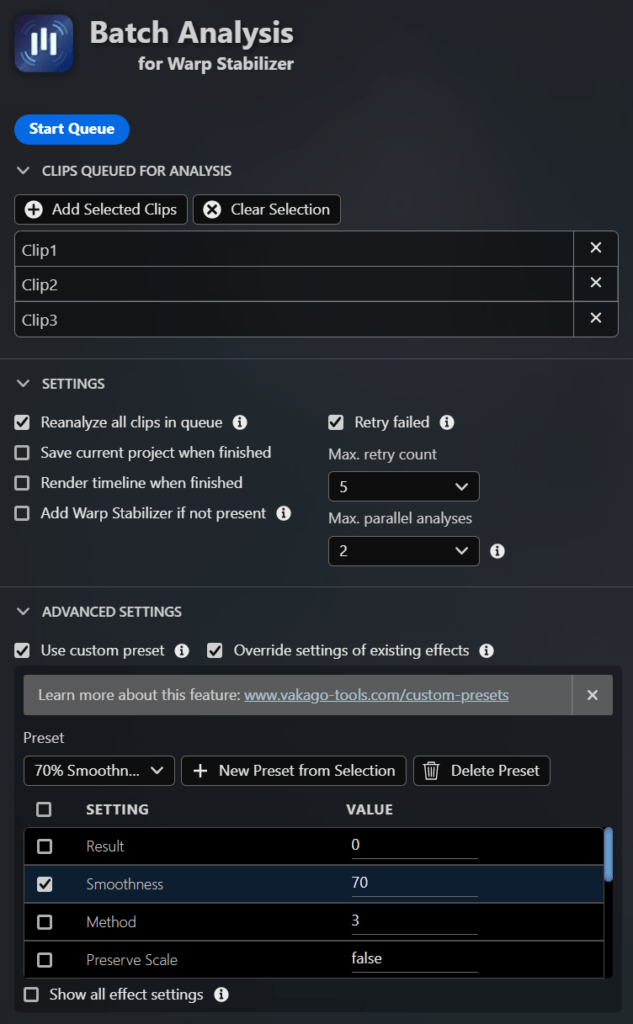
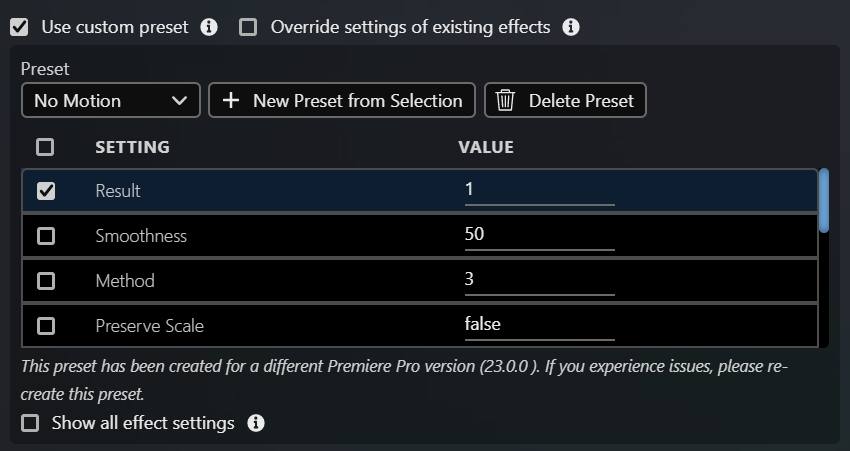
To create a new preset, we’ll need to open the advanced settings menu in the Batch Analysis extension panel and enable use custom preset. By default, the extension ships with two example presets: No Motion, which enables maximum stabilization and 20% Smoothness with a slight reduction in smoothness compared to the default settings.
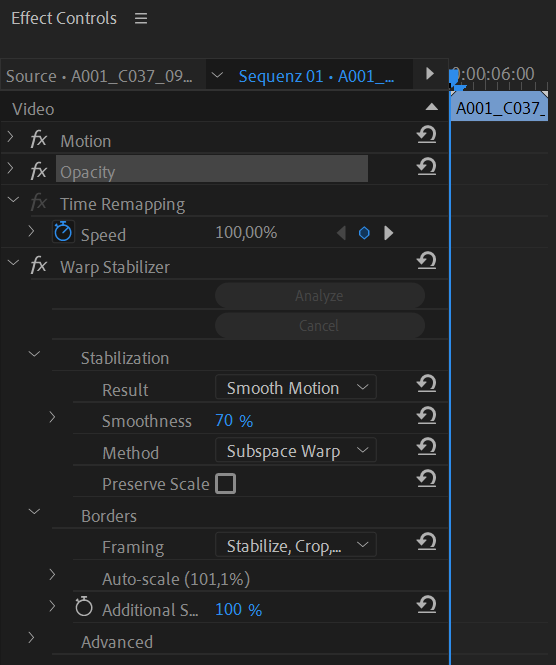
In this case we do not need the default presets and can remove them by clicking on delete preset. What we want to do is create a new preset from an already existing effect. For this we first select a clip that already has the Warp Stabilizer effect applied to it in the timeline and change the settings in the Premiere Pro settings panel as desired. In this case we are changing the smoothness to 70%:
Once we are happy with the result, we can navigate back to the extension panel and click on new preset from selection. We have to make sure that the clip with the previously configured Warp Stabilizer effect is selected in the timeline.
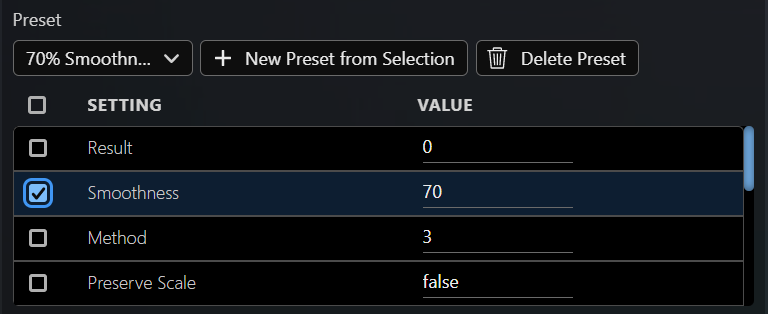
After creating the preset it is visible in the advanced settings section of the panel. By default, the settings are not applied to new clips. In order to apply the chosen property, we need to set a checkmark for smoothness:
When using this preset only the smoothness will be updated. For all other properties the defaults are used. This is convenient when using this feature in combination with the override settings of existing effects feature. We might not want to change everything but just update the smoothness for all clips. If you are happy with override all defaults you can choose the checkbox in the upper left corner, this will apply the full preset.
Using a Custom Preset
After previously creating a custom preset, we’ll now use the newly created preset for a new analysis. In our first example we’d like to add the Warp Stabilizer effect to several clips and override the default smoothness with 70%. First, we’ll select the previously created preset in the advanced settings and enable the add Warp Stabilizer if not present option. After running the queue, all clips have a smoothness of 70%.
Overriding Settings of Existing Effects
In our second example we want to update existing effects that we’ve previously analyzed with a new smoothness of 70%. In order to do so, we will now enable the override settings of existing effects option and add all previously stabilized clips to the queue. This option will automatically enable the reanalyze all clips in queue option. After running the queue all clips will have a smoothness of 70%. For optimal results the extension also triggers a re-analysis if needed.