Custom Warp Stabilizer Presets
Updating Warp Stabilizer effect settings for multiple clips can be a very time-consuming task in Adobe Premiere Pro. Fortunately, the Batch Analysis Extension offers a quick solution for updating effect settings, analyzing, and stabilizing clips automatically. With this extension, you can create your own presets for the Warp Stabilizer effect and automatically apply them to multiple clips in your Premiere Pro timeline.
The steps outlined below will guide you through the workflow of batch-updating settings for multiple clips at once.
Step-by-Step Guide
Batch Update Warp Stabilizer Settings in Premiere Pro
- Install the Batch Analysis Extension
Start by installing the Batch Analysis Extension. You can learn more about this extension on Vakago Tools or download it directly from Adobe Exchange: Batch Analysis Extension
- Open the Extension
Open the extension and load the project containing the clips you want to update with new settings. To do this, go to Window -> Extensions -> Batch Analysis for Warp Stabilizer and open the extension.
- Apply the Warp Stabilizer to a Clip
The steps below explain how to create a preset from an already configured Warp Stabilizer effect. If you prefer modifying an existing preset, you can proceed to Step 5.
Apply the Warp Stabilizer to a clip and configure it to your liking. For example, you can change the smoothness to 30%. The configuration of this effect will be used as a template in the next step. Make sure you’ve applied all the settings that you desire before proceeding. - Create a Custom Preset from an Existing Clip
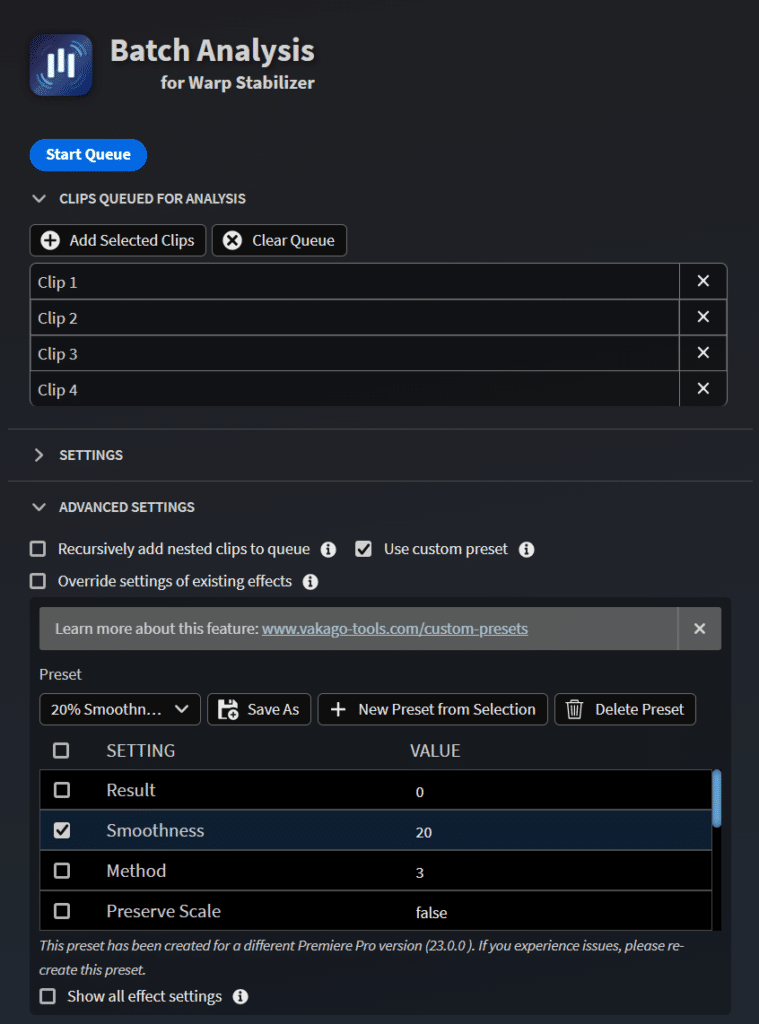
Make sure the clip with the previously configured Warp Stabilizer effect is selected in the timeline. In the Advanced Settings section, enable custom presets. Next, click on new preset from selection to create a new preset based on the existing effect.
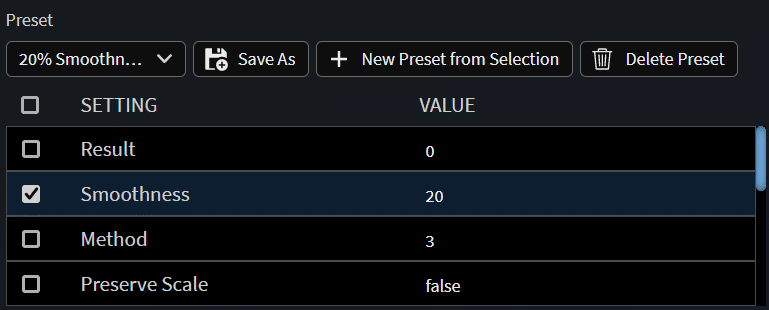
- Modify Preset
You can configure the preset according to your needs. Adjust parameters like Smoothness, Method, and other relevant settings. You can also select which settings should be applied/overridden when applying it to other clips. Ensure the respective check-boxes are checked if you want to activate certain settings. Settings that are not checked will be ignored when running the analysis queue.
- Apply the Custom Preset to Multiple Clips
Select the clips you want to apply the settings to in your Premiere Pro timeline and add them to the queue in the extension. To do this, click add selected clips. If you also want to add the Warp Stabilizer effect to selected clips where the effect has not yet been added, select the add Warp Stabilizer if not present option.
Ensure that the reanalyze all clips in the queue setting is selected. To override the settings of existing effects, enable the override settings of existing effects option. Choose the custom preset you created from the drop-down menu. - Reanalyze Clips
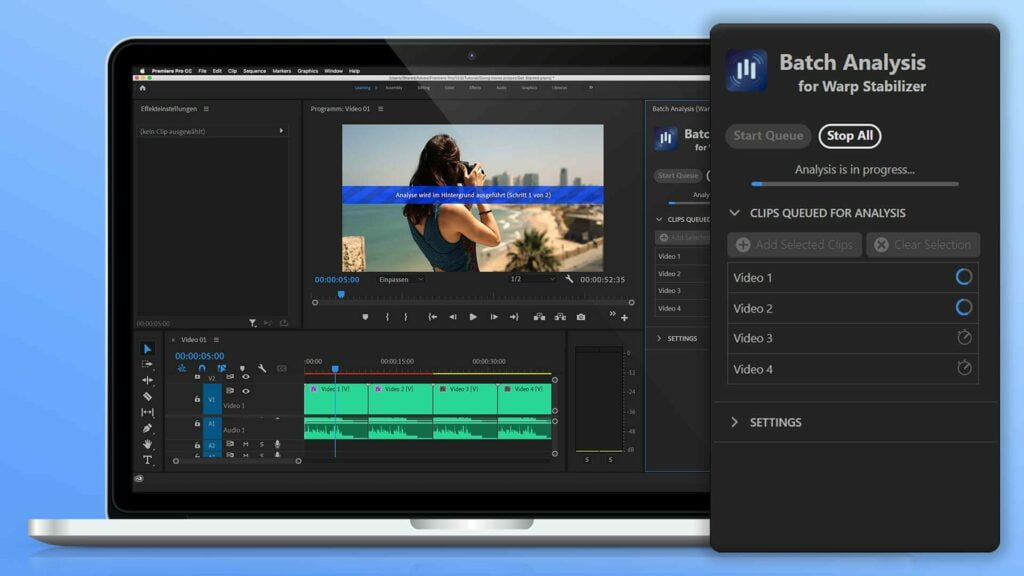
Click Start Queue to begin the analysis. The extension will sequentially analyze each clip based on your preset settings. If you are working on a larger project where reanalysis might take a while, it’s advisable to use the save current project when done feature to ensure your work is saved automatically once the analysis is complete.
Batch Stabilization for Warp Stabilizer
Easily update, reanalyze, and stabilize multiple clips with the Batch Stabilization and Analysis extension for Adobe Premiere Pro.
Additional information
For more detailed information and additional features of the extension, you can visit the following links:
Screenshots