Develop Your First Premiere Pro Extension: A Step-by-Step Guide
Adobe Premiere Pro is a powerful video editing software that is widely used by professionals in the film and television industry. One of the most powerful features of Premiere Pro is the ability to extend its functionality through the use of extensions. These extensions allow you to add new features and tools to the software, making it even more versatile and powerful.
If you’re a developer looking to create your first Premiere Pro extension, this guide will walk you through the process step-by-step.
Adobe CEP and Extendscript
Adobe CEP (Common Extensibility Platform) and Extendscript are two technologies that are used to extend the functionality of Adobe Creative Cloud applications. While they share some similarities, they are also quite different in their capabilities and use cases.
One way to think about the difference between Extendscript and Adobe CEP is to consider Extendscript as the “backend code” and Adobe CEP as the “frontend part”. This means that Extendscript is responsible for handling the underlying functionality of an extension, such as communication with the application, data processing, and logic, while Adobe CEP is focused on the user interface and the way the user interacts with the extension. Both parts are essential to create a fully functional extension, and they work together to provide the desired functionality and user experience.
Extendscript
On the other hand, Extendscript is a scripting language that is based on JavaScript and is used to interact with the underlying application. You can use it to create scripts and extensions for Adobe Creative Cloud applications. Extendscript can be used to automate repetitive tasks, create custom scripts, and extend the functionality of the software. Extendscript requires a good understanding of the underlying API of the application and can be more complex than CEP.
ExtendScript Developer Tools
This article deals with the ExtendScript Developer Tools plugin for the Adobe Creative Cloud applications. Use below buttons to learn more.
Adobe CEP
Adobe CEP is a framework that allows developers to create HTML5-based extensions for Adobe Creative Cloud applications. These extensions can be created using web technologies such as HTML, CSS, and JavaScript and can be used to add new features and tools to the software, such as custom panels, dialogs, and menu items. CEP is designed to be easy to use and understand, even for developers with little or no experience with Adobe’s Creative Cloud applications.
One of the main differences between CEP and Extendscript is that CEP is designed to be used with web technologies, while Extendscript is a scripting language that is used to create scripts and extensions. CEP allows you to create the UI part of the extensions using web technologies such as HTML, CSS, and JavaScript, while Extendscript is a JavaScript-based scripting language that is used to create scripts and extensions.
CEP is designed to be easy to use and understand, even for developers with little or no experience with Adobe’s Creative Cloud applications. Extendscript, on the other hand, requires a good understanding of the underlying API of the application and can be more complex than CEP. For this reason one of the first steps you have to take if you want to become a plugin-developer for the Adobe Creative Cloud apps is understanding the APIs.
Step 1: Install the Extendscript Developer Tools
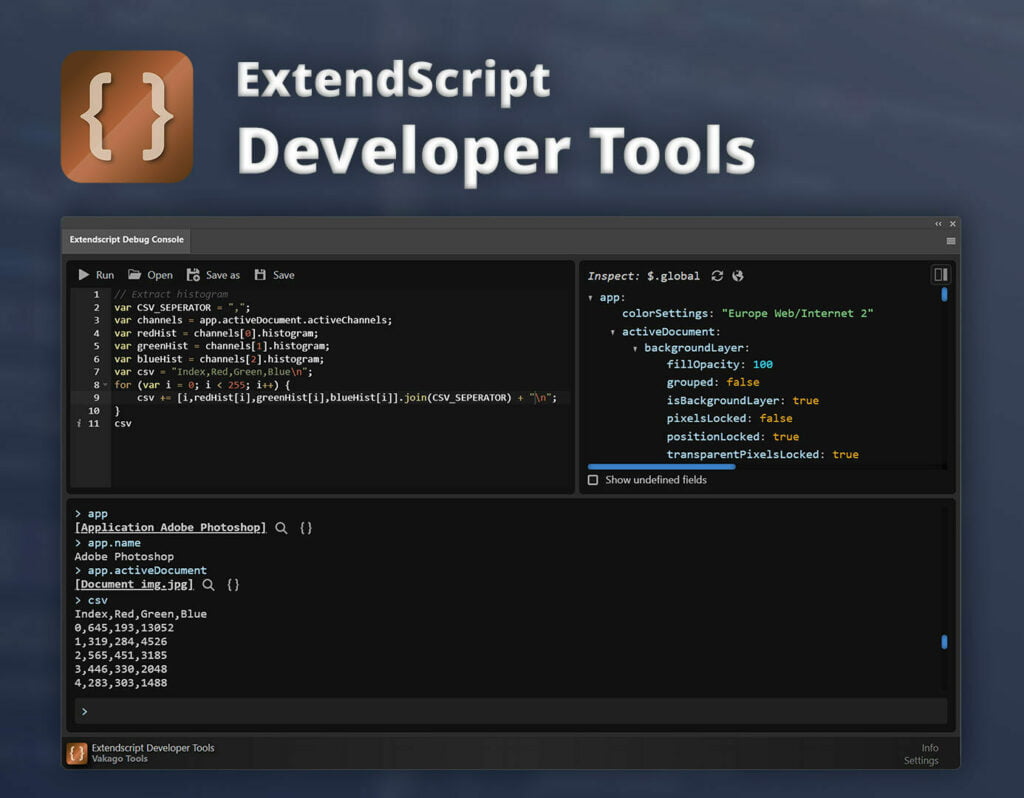
In this tutorial we’ll start by understanding the Premiere Pro API first. Before you can start writing your extension, you will need to install a tool (e.g. Extendscript Developer Tools) which allows you to execute Extendscript code. The Extendscript Developer Tools is a set of tools specifically designed for working with Adobe’s Extendscript language. Extendscript is a JavaScript-based scripting language that is used to create extensions for Adobe’s Creative Cloud applications, including Premiere Pro.
Step 2: Learn the Basics of Extendscript and the Premiere Pro API
Once you have the Extendscript Developer Tools installed, you will need to learn the basics of Extendscript and the Premiere Pro API. The Extendscript Developer Tools include a built-in code editor, which makes it easy to write and test your code. The Premiere Pro API documentation is also available online, which will help you understand how to interact with the software.
Once you have written your code, you can use the Extendscript Developer Tools to run and debug it directly from an extension panel. This will make it much easier to test your code and ensure that it is working correctly.
Step 4: Understand the QE API
The QE API is an undocumented API that provides access to the internal Premiere Pro event queue. This API can be used to create extensions that can interact with the software in real-time, making it possible to create extensions that can modify the playback state, change the timeline, and more. Learn more about the QE Api in this article: Understanding the Adobe Premiere Pro QE API
Step 5: Creating the UI
Once we have a basic understanding of Extendscript we can create a new CEP extension project. This can be done by creating a new folder and giving it the name of your extension. Inside the folder, you will need to create a file called “manifest.xml” which will contain the configuration for your extension.
The folder structure for a CEP extension typically looks like this:
- Your_Extension_Name (root folder)
- CSXS
- client
- host
The “CSXS” folder contains the information that is required to make the extension work within the Adobe application. This includes the “manifest.xml” file which contains the configuration for the extension, such as the name, version, and description. The “client” folder contains the html, css and javascript that are used to represent the extension in the Adobe application. The “host” folder contains the ExtendScript code that is used to implement the functionality of the extension.
Once you have created the folder structure and the manifest.xml file, you can start writing the JavaScript code for your extension. Adobe provides an extensive documentation and examples, which can help you understand how to interact with the Adobe application, and how to create the different UI elements, such as buttons and dialogs.
It’s important to note that CEP extension can be written for different Adobe Creative Cloud Application, such as Premiere Pro, Photoshop, Illustrator, etc, and each application have its own APIs and the way the extensions should be structured.
Step 6: Package and Distribute your Extension
Once you have completed your extension and it is working correctly, you will need to package and distribute it. This can be done through the Adobe Exchange website, which allows you to share your extensions with other Premiere Pro users.
In conclusion, creating a Premiere Pro extension can be a challenging and rewarding experience. By using the Extendscript Developer Tools, learning the basics of Extendscript and the Premiere Pro API, and understanding the QE API, you can create powerful extensions that will help you to work more efficiently and effectively with Premiere Pro.