Horizon leveling in Adobe Premiere Pro
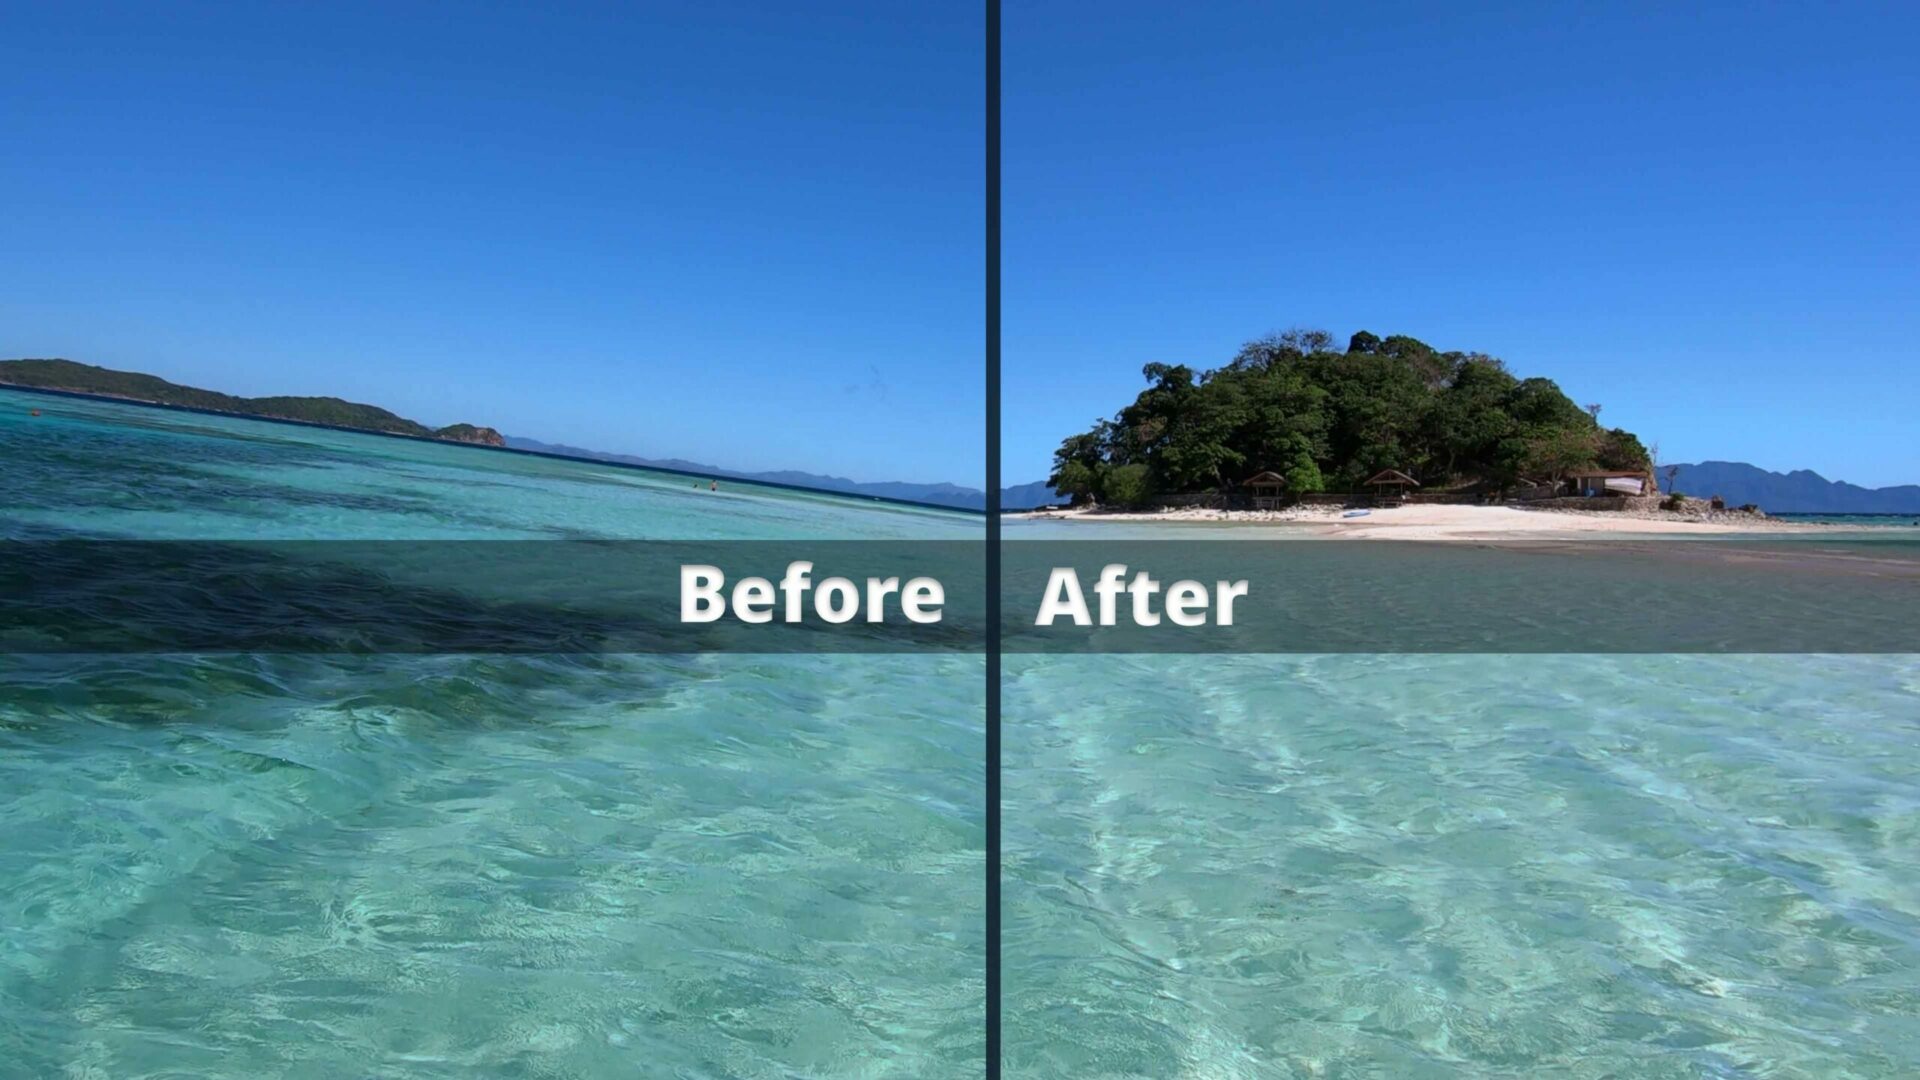
Tilted footage is a typical issue when shooting videos: Especially when shooting videos handheld or with badly calibrated gimbals this can occur. Ideally, you are using a tripod with a build in level for your video shoots to ensure your horizon is level. However, even if you have footage with a crooked horizon, Premiere Pro makes it very simple to straighten the horizon.
Below you can find a quick tutorial on how to easily fix a crooked horizon by either using the Adobe Premiere Pro onboard features or a plugin which will make the process even easier.
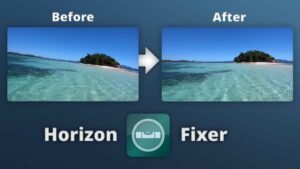
Horizon Fixer (Straighten Tool) Extension
This article mentions the Horizon Fixer plugin. Use below buttons to learn more.
Using Premiere Pro Onboard Features
1. Adjust the Rotation
You can manually rotate the video in the Effects Control Panel’s Rotation Settings if you don’t want to use plugins. Next, rotate your clip until you are satisfied with the horizon line. When rotating, you can use a grid to ensure that the horizon is always absolutely straight. Plugins such as the Horizon Fixer can automate this task.
2. Zoom in and remove corners
When rotating your footage you’ll find that some black edges appear in the corner of the screen. You will therefore need to modify the scale by going to the scale settings. To avoid cropping in too much you’ll need to find the correct crop level. Zooming in too much might compromise the quality of your video. Especially when adjusting the rotation over time (keyframing) you’ll have to scale in until no corners are visible anymore. When using keyframes you’ll need to repeat the process for all keyframes until every frame does not show black corners anymore. Extensions such as the Horizon Fixer will automate this task and always choose the optimal zoom level.
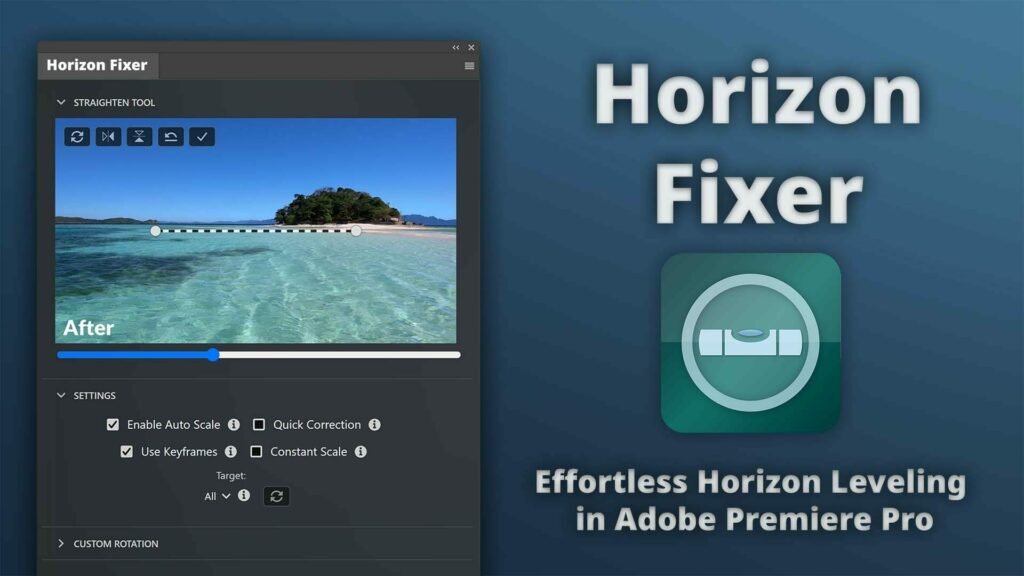
Using the Horizon Fixer Premiere Pro Extension
The Horizon Fixer plugin comes in very handy when you need a perfectly straight horizon, want to stabilize the horizon if the tilt changes over time, or you have a lot of footage to work with and the previous steps are too time-consuming.
The extension is very similar to Lightroom’s Straighten Tool. It can be used to correct tilted footage by simply drawing a line that follows the horizon. The plug-in automatically adapts the zoom level to prevent black bars and corners. It is also quite easy to stabilize the horizon if the camera tilt changes over time: The keyframe feature can be turned on to correct the horizon. The horizon between keyframes will be automatically interpolated and corrected by the extension.
Horizon Stabilization
You can activate keyframing if the tilt of your footage varies over time. Just straighten out the clip’s horizon at the beginning and let it run for a few frames or seconds. The extension works well together with the Warp Stabilizer effect. It is often helpful to use the Warp Stabilizer effect before utilizing the straighten tool when stabilizing the tilt of your horizon. You can adjust the horizon again if it becomes off, and the extension will automatically correct all frames in between the two keyframes.
Constant Scale
The automatic scaling may cause a sudden shift in zoom levels if the tilt of your video is variable. This might happen when you were filming handheld or from a boat. This plugin has a function called constant scale that takes care of the problem. When this feature is used, the extension automatically detects the highest zoom level required to maintain the horizon of the clip and adjusts the scale to that level.

Video
Frequently asked Questions
Leveling a crooked horizon is relatively simple:
1. Open the Straighten Tool (Horizon Fixer)
2. Drawing a line that follows the horizon
3. The extension will automatically adapt the rotation and scale of your video.
4. If the tilt changes over time you can also stabilize the horizon over time using the Horizon Fixer. Read this article to learn more.
Leveling a crooked horizon is relatively simple. Read this article or follow the below steps:
1. Open the Horizon Fixer Extension
2. Draw a line that follows the horizon. The extension will now automatically adapt the rotation and scale of your video.
4. If the tilt changes over time you can also stabilize the horizon over time using the Horizon Fixer. Read this article to learn more.
When using the Horizon Fixer Extension you can automatically stabilize a crooked horizon. Simply draw a line that follows the horizon of your video and the extension will automatically adapt the rotation and scale of your video.
While Premiere Pro does not have an easy-to-use build in feature for Horizon stabilization yet, there are Extensions such as the Horizon Fixer Extension which can stabilize a tilted horizon which is changing over time. The Extension can be downloaded from Adobe Exchange.
Premiere Pro does not have a straighten tool. However there is an extension called Horizon Fixer which adds this functionality to Premiere Pro
Step-by-step: Fix Horizon
Horizon straightening in Premiere Pro
- Open the Horizon Fixer Extension
Open the Horizon Fixer Extension and navigate to the Straighten Tool in the Plugin’s panel. If you do not have the extension yet, you can download it from Adobe Exchange.
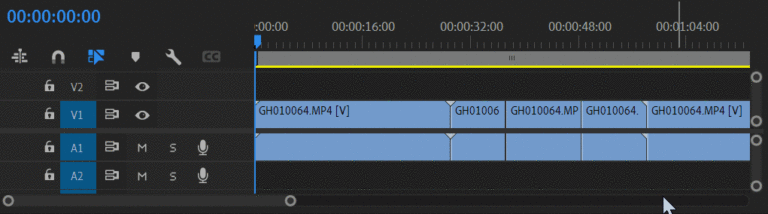
- Select the clip(s)
Select the clip(s) that you want to level in your timeline:
%22%20transform%3D%22translate(1%201)%20scale(1.95313)%22%20fill-opacity%3D%22.5%22%3E%3Cellipse%20fill%3D%22%23090909%22%20rx%3D%221%22%20ry%3D%221%22%20transform%3D%22rotate(108%206%2018)%20scale(78.56663%2039.42352)%22%2F%3E%3Cellipse%20fill%3D%22%23484848%22%20cx%3D%22174%22%20cy%3D%2270%22%20rx%3D%22120%22%20ry%3D%22120%22%2F%3E%3Cpath%20fill%3D%22%230d0d0d%22%20d%3D%22M48%2074V59l-8%2017z%22%2F%3E%3Cpath%20fill%3D%22%23474747%22%20d%3D%22M49%2053h7v18h-7z%22%2F%3E%3C%2Fg%3E%3C%2Fsvg%3E)
- Draw a new horizon line
Draw a line that follows the horizon in the extension panel. The extension will now automatically adapt the rotation and scale of your video.
%22%20transform%3D%22translate(.6%20.6)%20scale(1.17188)%22%20fill-opacity%3D%22.5%22%3E%3Cpath%20fill%3D%22%23003b2b%22%20d%3D%22M179%20152l-74-92-121%2080z%22%2F%3E%3Cellipse%20fill%3D%22%235c94f6%22%20cx%3D%22204%22%20cy%3D%2234%22%20rx%3D%2263%22%20ry%3D%2263%22%2F%3E%3Cellipse%20fill%3D%22%2394a6c7%22%20cx%3D%2225%22%20cy%3D%2228%22%20rx%3D%22114%22%20ry%3D%2240%22%2F%3E%3Cellipse%20fill%3D%22%2369714a%22%20rx%3D%221%22%20ry%3D%221%22%20transform%3D%22rotate(107.3%20-7.7%2043.3)%20scale(18.43809%2087.75685)%22%2F%3E%3C%2Fg%3E%3C%2Fsvg%3E)
- Stabilize the Horizon
If the tilt changes over time you can also stabilize the horizon over time using the Horizon Fixer. Read this article to learn more.

Stabilizing many Videos
The Horizon Fixer Plugin works well with the Batch Stabilization Analysis Extension. To get extra-smooth videos, stabilizing the footage is advised before horizon correction. However, stabilizing multiple clips at once is difficult. This problem is solved with the Batch Analysis addon, which enables automatic video stabilization within Adobe Premiere Pro. Videos can be background-stabilized before the horizon correction is applied.
The Batch Stabilization Batch Stabilization Analysis Extension is an Adobe Premiere Pro plugin that allows you to queue clips for stabilization. In order to stabilize and analyze clips sequentially and in the background, the plugin employs the Warp Stabilizer effect.
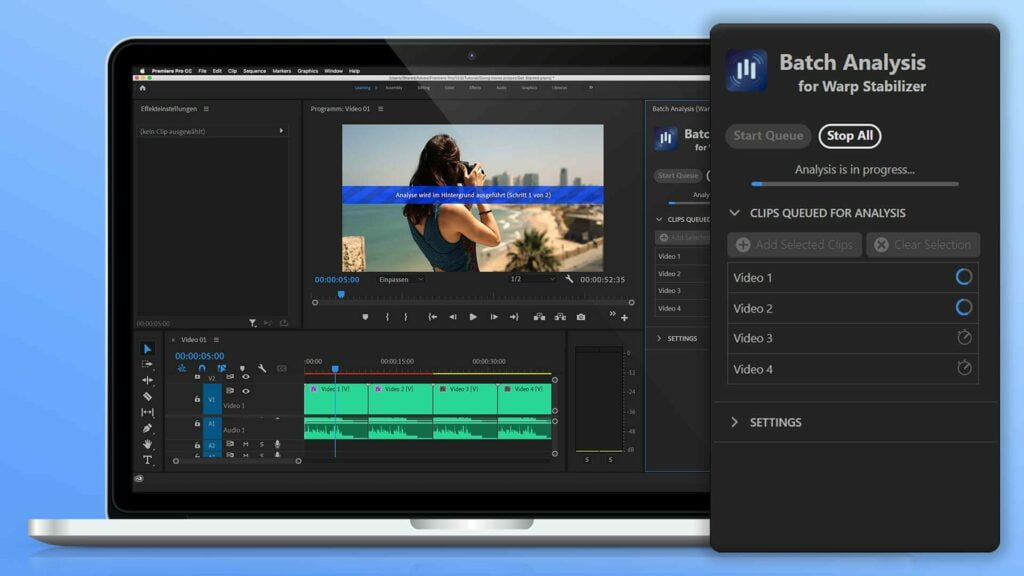
Batch Stabilization Extension
Learn more about the Batch Stabilization Extension mentioned above: