How to stabilize multiple clips on the timeline in Premiere Pro
Many Premier Pro users face the issue that they have lots of shaky footage that they would like to stabilize. Unfortunately the default features in Premiere Pro only allow you to stabilize one clip after another. While it is possible to apply the warp stabilizer effect to multiple clips by dragging the effect onto multiple clips in the timeline it is not straight forward to stabilize multiple clips sequentially. Plugins such as the Batch Stabilization Extension are needed to automatically stabilize all clips one after another in the background or over night.
Batch Analysis for Warp Stabilizer
This article deals with the Batch Stabilization plugin. Use below buttons to learn more about the extension:
Stabilizing multiple clips automatically
If you have already installed the Batch Stabilization Extension you can access it under Window > Extensions > Batch Analysis.
Next, make sure that all clips that should be analyzed have been added to the timeline. It’s always a good idea to make sure that the clips are already cut as the analysis time scales with the footage’s length.
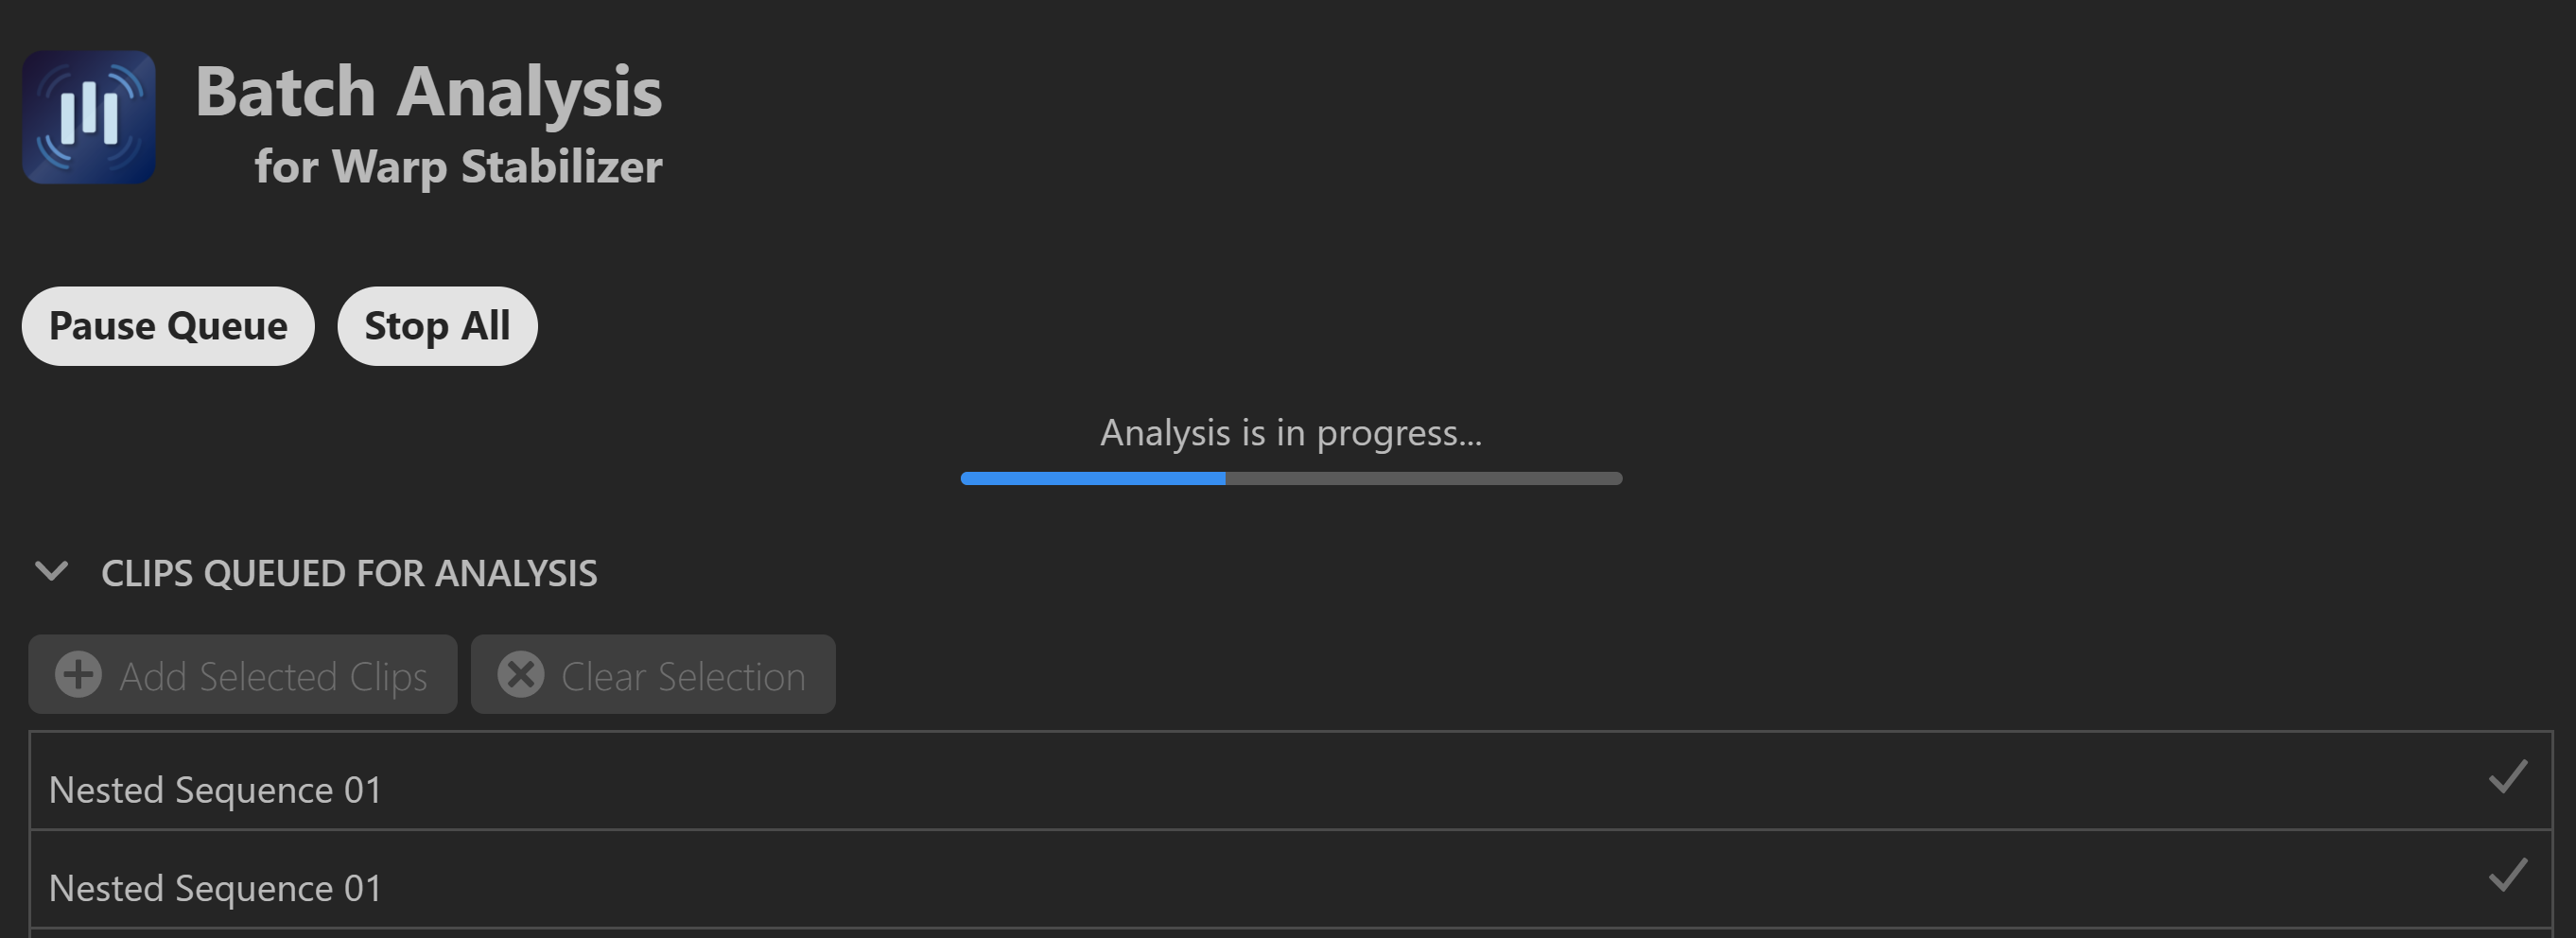
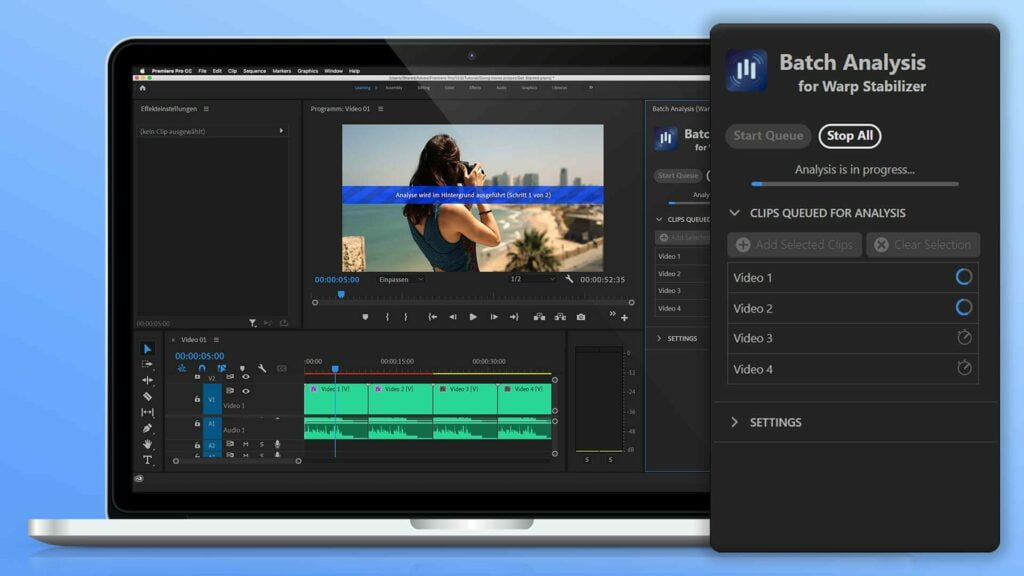
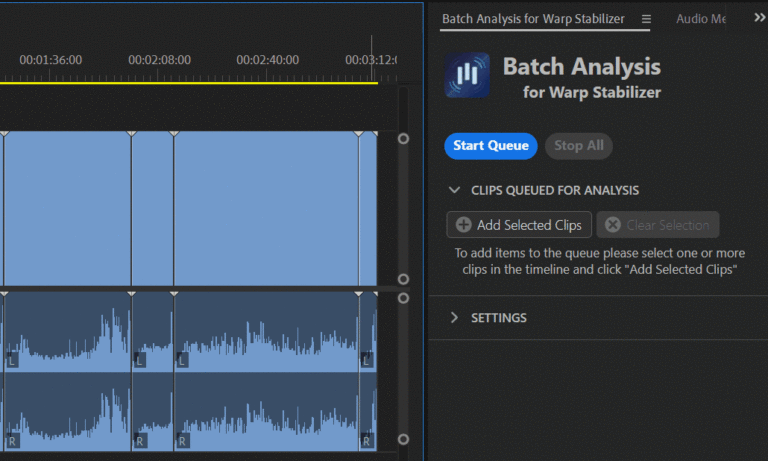
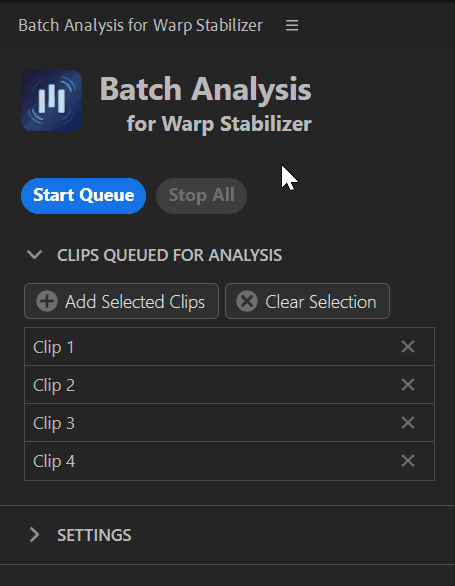
To stabilize multiple clips on your timeline sequentially, select all of the clips you wish to stabilize from your Premiere Pro timeline. Then, in the Batch Analysis Plugin Panel, select “Add Selected Clips”. Make sure “Add Warp Stabilizer if not present” is activated in the settings window and enable “Use detailed analysis” if you prefer a more thorough stabilization. You can also queue clips from other sequences or projects. After you’ve added all of the clips you want to stabilize to the queue, click “Start Queue” and wait for the stabilization to finish.
Step by Step
Time needed: 5 minutes
How to stabilize multiple clips on the timeline in Premiere Pro
- Install the Batch Stabilization Analysis extension
If you have not installed the extension already make sure you download it from from Adobe Exchange and open the extension panel under Window > Extensions > Batch Analysis.
%22%20transform%3D%22translate(3.7%203.7)%20scale(7.41797)%22%20fill-opacity%3D%22.5%22%3E%3Cellipse%20fill%3D%22%233b3750%22%20rx%3D%221%22%20ry%3D%221%22%20transform%3D%22rotate(19.3%20-129.1%2022)%20scale(36.61337%2065.76033)%22%2F%3E%3Cellipse%20fill%3D%22%23fff%22%20rx%3D%221%22%20ry%3D%221%22%20transform%3D%22matrix(-89.52285%20-25.0297%2014.8203%20-53.00725%20171.3%2044)%22%2F%3E%3Cellipse%20fill%3D%22%23aaaba2%22%20cx%3D%2238%22%20cy%3D%222%22%20rx%3D%2216%22%20ry%3D%22146%22%2F%3E%3Cellipse%20fill%3D%22%23fff%22%20rx%3D%221%22%20ry%3D%221%22%20transform%3D%22rotate(-74.7%20112.3%20-96.3)%20scale(43.02401%2099.77931)%22%2F%3E%3C%2Fg%3E%3C%2Fsvg%3E)
- Select all clips that you would like to stabilize
In your timeline, select all clips that you would like to queue for stabilization. You can select clips from different sequences as well. Next, click on “Add Selected Clips” in the extension panel. The clips will then be added to the stabilization queue. Choose whether you would like to enable parallel stabilization. This can increase the analysis speed but will use slightly more RAM.
%22%20transform%3D%22translate(1.2%201.2)%20scale(2.34375)%22%20fill-opacity%3D%22.5%22%3E%3Cellipse%20fill%3D%22%236f93ef%22%20rx%3D%221%22%20ry%3D%221%22%20transform%3D%22matrix(-75.88037%2036.51876%20-27.17972%20-56.4753%2037.5%20106.6)%22%2F%3E%3Cellipse%20fill%3D%22%230b0400%22%20rx%3D%221%22%20ry%3D%221%22%20transform%3D%22rotate(117.5%2082.8%20123.3)%20scale(162.66097%2074.44608)%22%2F%3E%3Cellipse%20fill%3D%22%234fabce%22%20cx%3D%2238%22%20cy%3D%2276%22%20rx%3D%2261%22%20ry%3D%2223%22%2F%3E%3Cpath%20fill%3D%22%233c3627%22%20d%3D%22M215-14L-16%201l215%2075z%22%2F%3E%3C%2Fg%3E%3C%2Fsvg%3E)
- Start the stabilization
Click on the “Start Queue” button to begin the sequential stabilization of the previously selected clips.
%22%20transform%3D%22translate(.8%20.8)%20scale(1.50781)%22%20fill-opacity%3D%22.5%22%3E%3Cellipse%20fill%3D%22%2355535a%22%20rx%3D%221%22%20ry%3D%221%22%20transform%3D%22matrix(54.66482%20-45.59545%2034.76627%2041.68161%2062%2071.4)%22%2F%3E%3Cpath%20fill%3D%22%23181818%22%20d%3D%22M208-16l-14%20287-92-187z%22%2F%3E%3Cellipse%20fill%3D%22%23181818%22%20cx%3D%2273%22%20cy%3D%22236%22%20rx%3D%22105%22%20ry%3D%22105%22%2F%3E%3Cellipse%20fill%3D%22%23422ea6%22%20cx%3D%2230%22%20cy%3D%2284%22%20rx%3D%2217%22%20ry%3D%2211%22%2F%3E%3C%2Fg%3E%3C%2Fsvg%3E)

Popular Questions
If you are using the Batch Stabilization Extension you can select all clips from your Premiere Pro timeline and click “Add Selected Clips” in the extension panel. After you’ve added all of the clips you want to stabilize to the queue, click “Start Queue” and wait for the stabilization to finish.
Stabilizing too many clips at once in Premiere Pro is usually a bad idea as it needs a lot of RAM. Automatic sequential stabilization is often more stable and faster. You can use the Batch Stabilization Extension to stabilize multiple clips automatically. Click here to learn more.
It is possible. However it usually leads to worse results compared to stabilizing the clips sequentially. If you want to stabilize multiple clips at once you can use the Batch Stabilization Extension.